E-ACE DMMRUTXB
E-ACE 4.3-Inch Dual Lens Car DVR Rearview 后视镜行车记录仪用户手册
Model: DMMRUTXB
1. 产品结束view
The E-ACE 4.3-inch Dual Lens Car DVR Rearview Mirror Dash Cam is designed to enhance driving safety by providing comprehensive video recording of your journeys. This device integrates a front-facing camera and supports an optional rear-facing camera, offering a wide field of view and continuous recording capabilities. Its sleek design replaces your existing rearview mirror, providing a discreet and integrated solution for vehicle surveillance.
Key features include a 4.3-inch high-definition display, dual-lens recording, night vision, loop recording, and a G-sensor for automatic incident detection.

Image: The E-ACE rearview mirror dash cam displaying both front and rear camera feeds on its integrated screen.
2. 包装内容
请检查包裹内是否有以下物品:
- E-ACE Rearview Mirror Dash Cam Unit
- 车载充电器
- Fixed Bandages (for mounting)
- 用户手册
- 读卡器
- 可选:后部 View Camera + Cable (6M or 10M, depending on variant)
- Optional: Buck Line (for parking monitoring power)
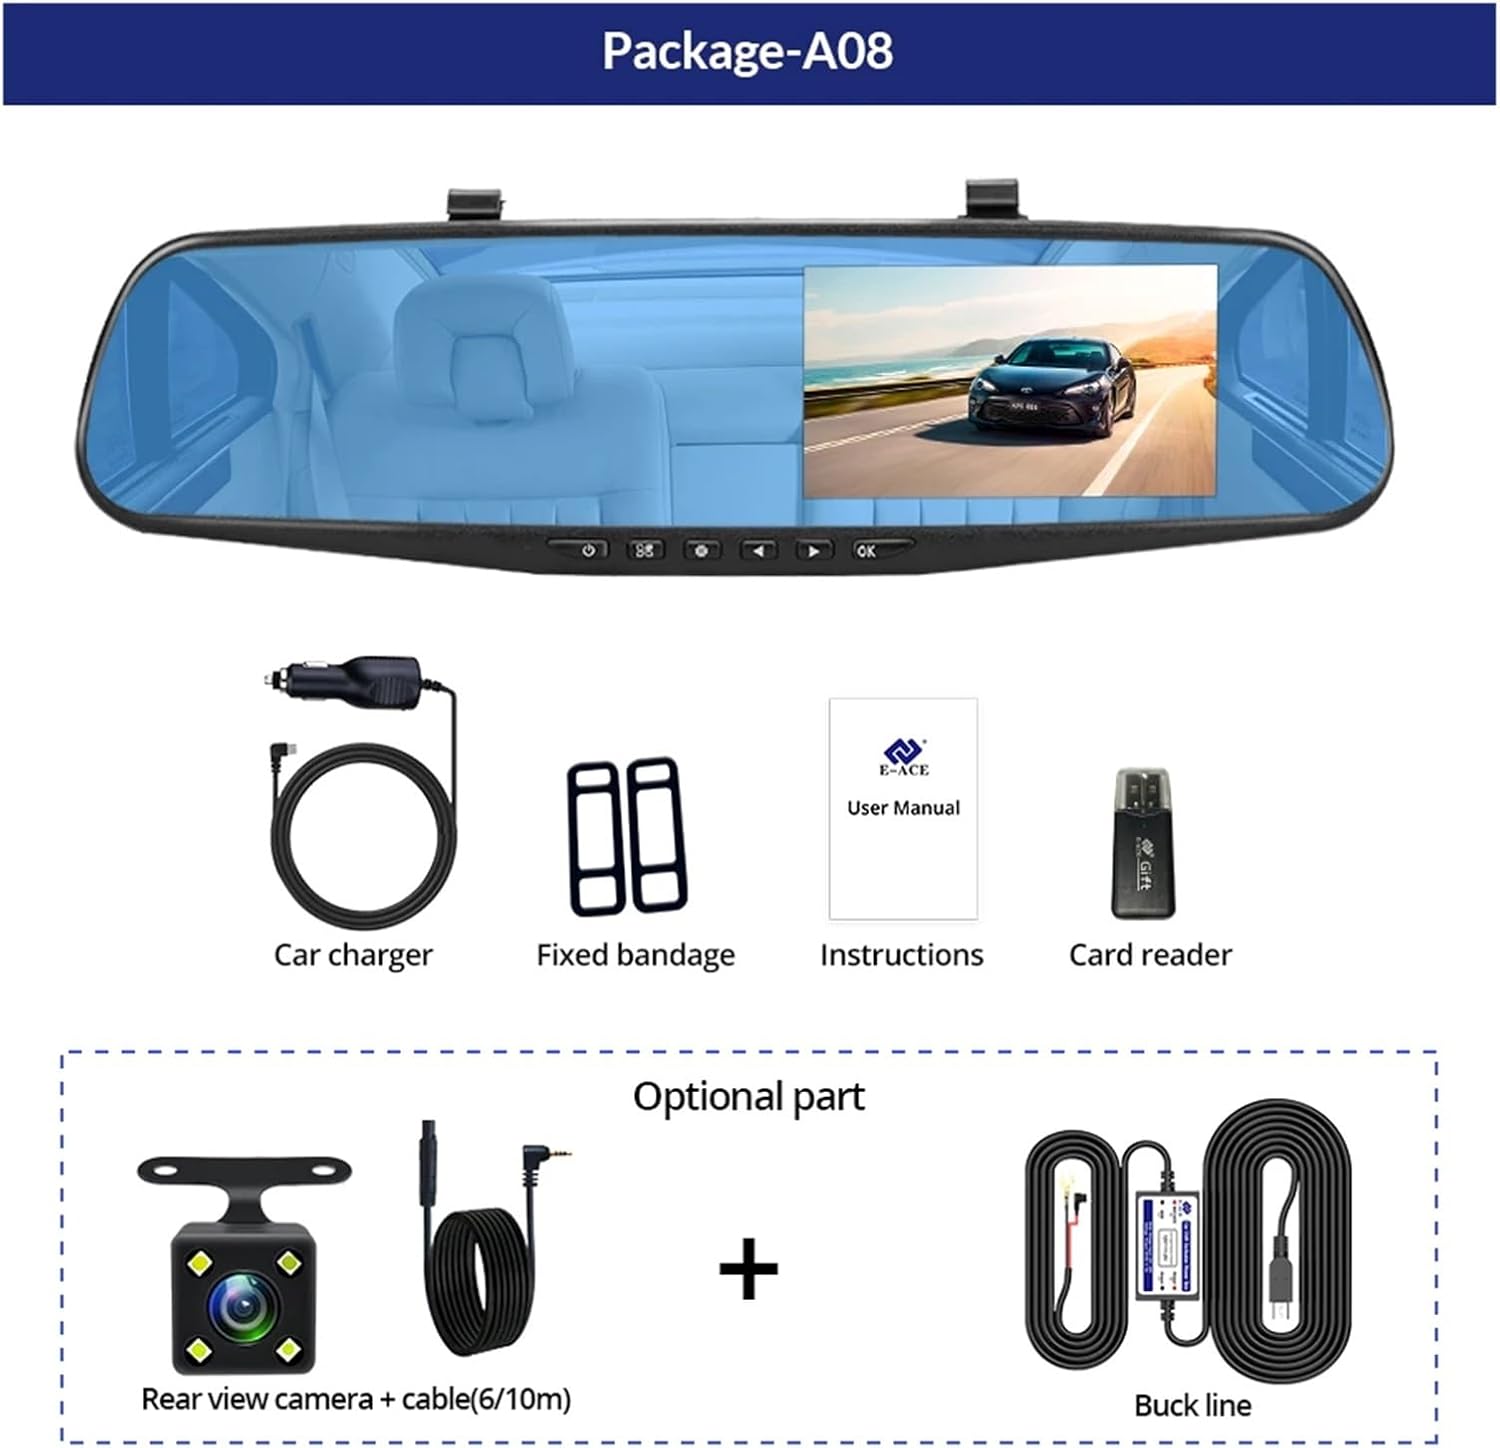
Image: A visual representation of the items included in the E-ACE dash cam package, showing the main unit and accessories.
3。 产品功能
- 4.3英寸高清显示屏: Provides clear visibility for real-time monitoring and playback.
- 双镜头设计: Captures both front and rear footage simultaneously for comprehensive coverage.
- Built-in Night Vision Technology: Ensures clear recordings in low-light conditions.
- 用户友好的安装: Sleek rearview mirror design integrates seamlessly into your vehicle.
- 循环录音: 自动覆盖最旧的 footag当存储卡已满时,确保连续录制。
- G-Sensor Feature: Detects sudden movements or impacts and automatically locks the current video file 以防止它被覆盖。
- 停车监控: Records video when motion or impact is detected while the vehicle is parked (requires buck line connection).
- 170度广角: 提供广泛的 view 未来之路。
- 反转图像: Displays the rear camera view 倒车时请遵守停车指南。

Image: An illustration highlighting the various functional features of the E-ACE dash cam.
4.元件识别
Familiarize yourself with the various parts and controls of your E-ACE dash cam:

Image: A detailed diagram identifying the buttons, ports, and features on the E-ACE dash cam unit.
- 开/关按钮: 开启或关闭设备电源。
- 菜单按钮: 访问设置和选项。
- 模式按钮: 可在视频录制、拍照和播放模式之间切换。
- 向上按钮: 在菜单中向上导航或调整设置。
- 向下按钮: 在菜单中向下导航或调整设置。
- 确定按钮: Confirms selections or starts/stops recording.
- TF卡插槽: 将您的MicroSD(TF)卡插入此处。
- AV输入端口: 连接后置摄像头。
- USB 端口: 用于供电和数据传输。
- 重置按钮: Resets the device to factory settings (use a thin pin).
- 麦克风: 录制车内音频。
5. 设置和安装
5.1 插入存储卡
Before installation, insert a high-speed MicroSD (TF) card (Class 10 or higher, up to 64GB recommended) into the TF Card Slot (7) with the contacts facing the screen. Ensure the card is inserted correctly until it clicks into place.
5.2 安装行车记录仪
- Attach the fixed bandages to the back of the dash cam unit.
- Securely strap the dash cam over your vehicle's existing rearview mirror using the fixed bandages. Ensure it is centered and stable.
5.3 连接电源
- Connect the car charger to the USB Port (9) on the dash cam.
- 将车载充电器的另一端插入车辆的点烟器插座。
- Route the power cable neatly along the windshield trim to avoid obstructing your view.
5.4 安装后置摄像头(选配)
- Connect the rear camera cable to the AV-IN Port (8) on the dash cam.
- Route the rear camera cable from the dash cam to the rear of your vehicle. This typically involves tucking the cable under the headliner and along the side pillars.
- Mount the rear camera on the rear windshield or near the license plate using its adhesive or screws. Ensure it has a clear view 后面的路。
- If using the reverse image function, connect the red wire from the rear camera cable to your vehicle's reverse light power supply.
6.操作说明
6.1 开/关机
- 自动的: The dash cam will automatically power on and start recording when your vehicle's ignition is turned on (if connected to a switched power source).
- 手册: Press and hold the ON/OFF Button (1) to manually power the device on or off.
6.2 基本操作
- 切换模式: Press the Mode Button (3) to cycle between Video Recording, Photo, and Playback modes.
- 访问菜单: In any mode, press the Menu Button (2) to enter the settings menu. Use the UP (4) and Down (5) buttons to navigate, and OK (6) to select.
- 开始/停止录音: In Video Recording mode, press the OK Button (6) to manually start or stop recording.
6.3 显示模式
While recording, you can typically switch between different display views by pressing the UP or Down buttons:
- 仅前置摄像头
- Rear Camera Only
- Picture-in-Picture (Front main, Rear sub-window)
- Picture-in-Picture (Rear main, Front sub-window)
6.4 循环录音
Set the loop recording duration (e.g., 1, 3, or 5 minutes) in the settings menu. When the memory card is full, the oldest unlocked file旧录音将被新录音覆盖。
6.5 重力传感器
The G-sensor automatically detects collisions or sudden braking. When triggered, it locks the current video file, preventing it from being overwritten by loop recording. Adjust sensitivity in the settings.
6.6 停车监控(可选)
If the buck line is installed, the dash cam can monitor your vehicle while parked. When motion or impact is detected, it will automatically record a short video. Enable this feature in the settings.
6.7 日期和时间设置
It is important to set the correct date and time in the system settings for accurate timestamp在你的录音中。
7. 维护
- 打扫: 请使用柔软的干布清洁镜头和屏幕。避免使用研磨性清洁剂或溶剂。
- 存储卡: Format the MicroSD card regularly (e.g., once a month) within the dash cam's settings to maintain optimal performance and prevent data corruption. Back up important files 在格式化之前。
- 温度: Avoid exposing the device to extreme temperatures, as this can affect battery life and component integrity.
- 固件更新: 检查制造商的 web网站会定期发布固件更新,这些更新可能会提高性能或增加功能。
8。 故障排除
| 问题 | 可能的原因 | 解决方案 |
|---|---|---|
| 行车记录仪无法开机。 | 无电源;充电器故障;连接松动。 | Check car charger connection and vehicle's cigarette lighter. Try a different USB cable/charger. |
| 录音自动停止。 | Memory card full; slow memory card; G-sensor sensitivity too high. | Format the memory card. Use a Class 10 or higher MicroSD card. Lower G-sensor sensitivity in settings. |
| 视频tage 模糊不清。 | 镜头上有保护膜;镜头脏污;对焦不正确。 | Remove any protective film. Clean the lens with a soft cloth. |
| 后置摄像头不显示。 | 连接松动;电缆/摄像头故障。 | Check the AV-IN connection. Ensure the rear camera is properly installed. |
| 设备死机或崩溃。 | 软件问题;存储卡错误。 | Press the Reset Button (10) with a thin pin. Format the memory card. |
9. 规格
- 模型名称: DMMRUTXB
- 展示: 4.3英寸
- 相机: Dual Lens (Front & Rear support)
- 视频分辨率: FHD 1920x1080P (Front)
- 特征: Loop Recording, G-Sensor, Night Vision, Parking Monitoring, 170-degree wide angle
- 贮存: Supports MicroSD (TF) card, Class 10 or higher (up to 64GB)
- 连接性: USB, AV-IN (for rear camera)
- 商品重量: 约 1.76 盎司(50 克)
- 包装尺寸: 大约 0.39 x 0.39 x 0.39 英寸
- 制造商: DMMRUTXB
10. 保修和支持
有关保修信息和技术支持,请参阅购买时提供的文档或直接联系零售商/制造商。请保留购买收据作为购买凭证。
Ask a question about this manual
Ask about setup, troubleshooting, compatibility, parts, safety, or missing instructions. Manuals+ will review the question and use this page’s manual context to help answer it.